Showing posts with label how to root android phone. Show all posts

Thursday, February 7, 2013

How to Root LG Nitro HD


LG Nitro HD is an Android smartphone by LG which comes from the family of the first 4G LTE smartphone series. It was launched in South Korea in the year 2011 and then it became available in all the shops across the world. Being an Android phone, you can root it to gain access to system files so you can install the applications on this phone which require Super user access. The following guide will help you to root your LG Nitro HD smartphone.

I. Before You Begin:

  1. Your phone’s warranty will be voided once it is rooted, you are rooting your phone keeping this in mind. However, you will be able to get back the warranty by applying either stock firmware or unrooting your phone.
  2. Charge your phone to have at least 60% of battery to ensure a smoother rooting process.
  3. You must have a PC running any Windows OS version.

II. Downloading Required Files:

  1. Download the LG Nitro HD Rooting Package from here.

III. Rooting LG Nitro HD:

  1. Unzip the files from the Rooting package you downloaded and place the files on your Desktop.
  2. On your phone, enable USB debugging . To do so, head to Menu>>Settings>>Applications>>Development>>USB debugging and tick-mark the box.
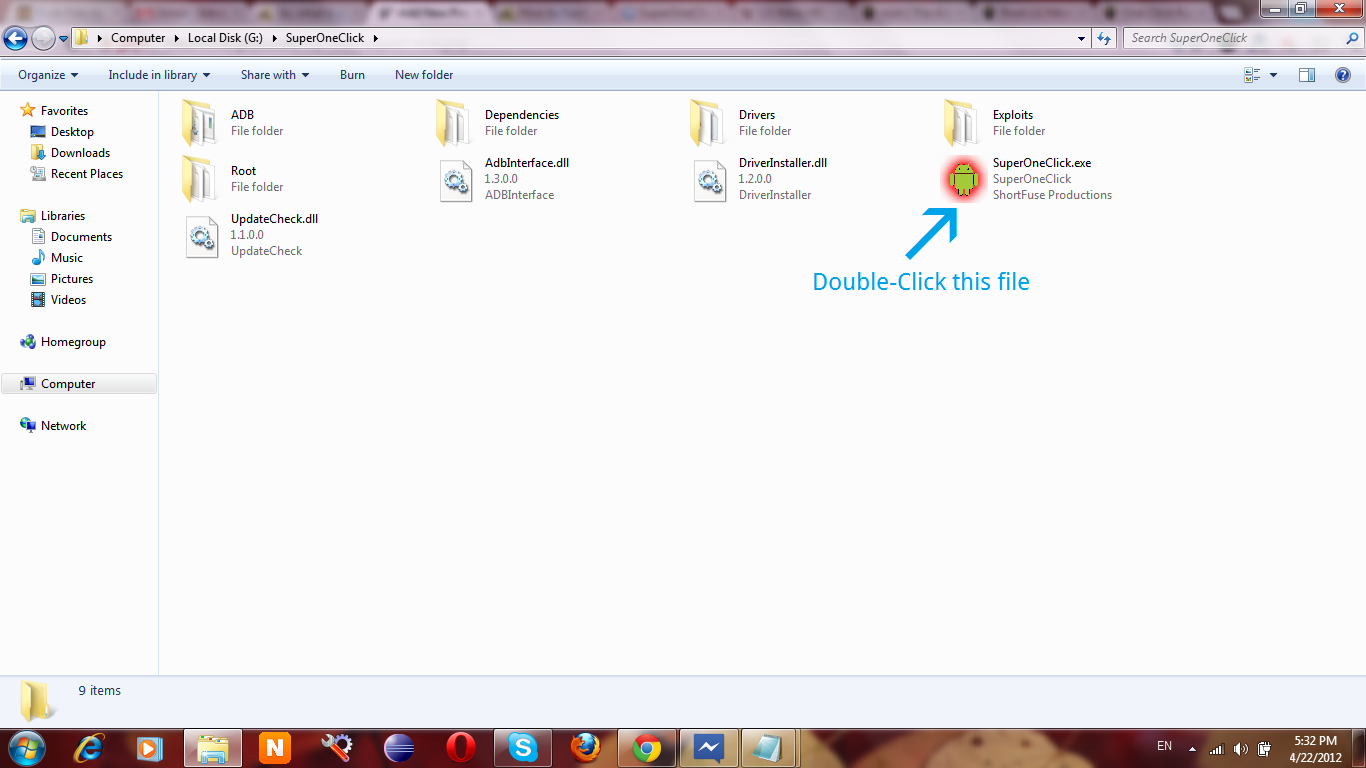
  3. Now, launch the SuperOneClick Rooting tool by double-clicking on SuperOneClick.exefile. See the following screenshot.
    Root-LG-Nitro-HD-SuperOneClick
    Double-Click SuperOneClick.exe file
  4. Connect your LG Nitro HD to your PC using the USB cable.
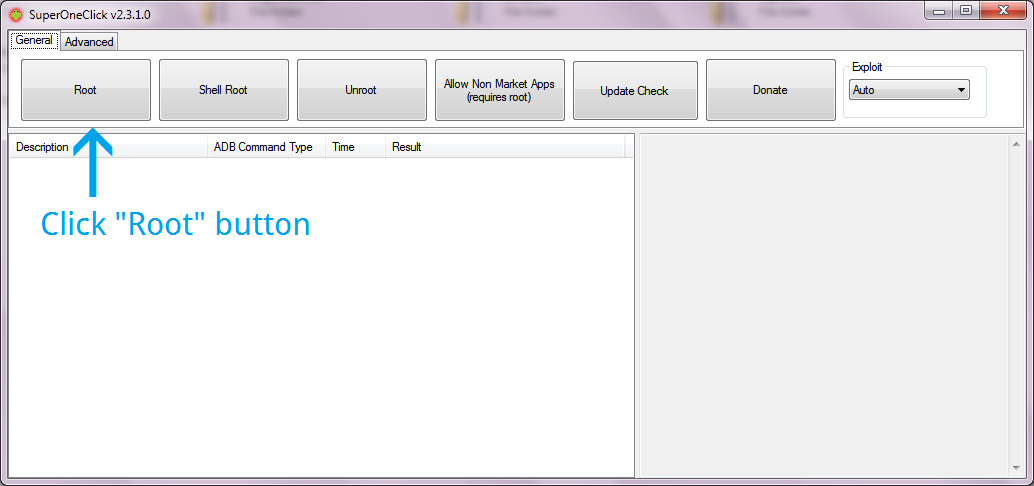
  5. From the main interface of the SuperOneClick tool, click on the Root button to begin rooting your phone. You will have a screen similar to following.
    Root-LG-Nitro-HD-SOC-Interface
    Click the "Root" button
  6. It will take some to finish the rooting process. Once it is done, you will see the success message in the SuperOneClick tool.
That’s all. You have successfully rooted your LG Nitro HD smartphone using the simple method described above.

Tuesday, January 29, 2013

How to Root the Sony Ericsson Xperia Neo V (MT11i) running Android 4.0.4 with a locked bootloader


The Sony Ericsson Xperia Neo recently got updated to Android 4.0 and while that is great news, it broke root access for many users.  This guide will show you how to fix that and regain root – read on to know how.

I.  Before You Begin

1.  This procedure works on the Xperia Neo V with a locked bootloader running Android 4.0.4.  If you have an unlocked bootloader, look to our post on the same to know how to root it.
2.  Remember to back up your data before you proceed any further!
3.  Make sure you have set up ADB before you proceed with this guide.  If you haven’t, read up on our post on how to do this.

II.  Necessary Downloads

1.  .431 Firmware (download the .431 ftf firmware for your device and save it to your computer)
3. .562 Kernel tft (download the .562 ftf firmware for your device and save it to your computer)
3. Root zip (download the .zip file under downloads)

III.  Flashing the .431 Firmware

1.  Double-click on flashtool .exe you downloaded above and follow the on-screen instructions to install it.
2.  Copy  both .ftf files you downloaded above to C:\Flashtool\firmwares on your harddrive.
3.  Open the Flashtool application after installation and click on the Flash icon (the one with the thunder symbol).
4.  You should be presented with two options:  Flashmode and Fastboot Mode.  Select Flashmode.
5.  Choose the kernel with the version number .431 in it and click on OK.  Follow the on-screen instructions on how to boot your device into fasboot mode and connect your device. Also, make sure”No Final Verification” is marked
6.  Reboot device.
This will have flashed your kernel back to .431 which is rootable.

IV.  Flashing the MT11i_4.1.A.0.562 Kernel

1.  Follow the same steps as described in Section III above until Step 5.
2.  On Step 5, select MT11i_4.1.A.0.562 instead of MT11i_4.1.B.0.431.
3.  Continue with the rest of the steps as in Section III.
You should now have an Xperia Neo running the .431 firmware but running a .562 kernel.

V.  Rooting the Xperia Neo V

1.  Enable USB Debugging on your device.  You can do this by heading to Settings > Applications > USB Debugging and checking the tickbox next to it.
2.  Enable installation of non-Market applications.  To do this, go to Settings > Applications and check the Unknown Sources tickbox.
3.  Connect your device to your Windows PC.
4.  Extract the DooMLoRD_v1_Xperia-2011-ICS-ROOT-emu-busybox-su.zip that you downloaded above to a folder on your desktop.
5.  From the extracted folder, double-click on runme.bat to run the DooMLoRD tool.
6.  Follow the on-screen instructions and wait for the process to be complete (your device will reboot several times during the procedure).
All credit goes to Madfysh on XDA for providing us the stock kernels and to DooMLoRD for working on the root tool!  Donate or thank them if you liked their work!!


Tuesday, January 15, 2013

How To Root and Unroot Samsung Galaxy Ace official Gingerbread 2.3 updgrade

If you’ve upgraded your Ace’s firmware to the official gingerbread update you might know that SuperOneClick rooting method doesn’t work anymore. Luckily there is another method involving installing a zip file from recovery which I’m going to explain now. This method is actually better since you don’t have to connect the ace to a computer. You can root and unroot on the fly. So in this tutorial I’ll be showing you how to root AND unroot you Samsung galaxy ace!
Caution: In my experience nothing has ever gone wrong with rooting. There is always that slight chance something can mess up. Use caution and only do this if you want to. I am not responsible if anything happens (but I really don’t think anything will happen if you do everything right)  Also rooting voids your warranty but don’t worry, unrooting should give it back like nothing ever happened.!!
Download the two zip files I’ve attached below

How to Root the Galaxy Ace 2.3

1. Copy the Root.zip file (download below) into your sd card. You can even put it in a folder if you want.

2. Turn your phone off

3. Boot your phone into recovery mode. To do that, hold HOME+POWER buttons. When the screen turns on and you see the Samsung logo, let go of POWER but keep holding HOME. After the Galaxy Ace logo shows up and disappears, you should enter recovery mode. You can let go of HOME now.

4. Now in recovery mode, you can scroll up and down using the VOLUME UP and VOLUME DOWN buttons and select using the HOME button.

5. Scroll to the second option “apply update from sdcard” and press HOME to select.

6. Scroll to the Root.zip file and select it (if you put it in a folder, find and open that folder and then select Root.zip

7. After it’s done installing, select “reboot system now” and wait for the phone to reboot

8. To check if your phone is rooted, go to you app drawer and look for an app called superuser with an icon of a pirate android with cross bones. If you see it, your phone is rooted.


Congrats! You’ve officially rooted you galaxy ace!!
Now what if you want to go back to unrooted for some reason , or just for the heck of it?? It’s easy. Very similar to rooting

How to Un-root the Ace 2.3:

1. Download unroot.zip (below) and put in sd card

2. Turn off the phone and boot into recovery (refer to step 3 above)

3. Install the unroot.zip (similar to step 5 and 6 above)

4. Restart phone (incase you’re THAT stupid, refer to step 7 above)

5. Look in the app drawer and if all went well, the superuser icon should no longer be there!!!

Your ace is now un-rooted! It’s that simple. Hope I’ve helped! I’m not sure this method works for froyo, but there are plenty of tutorials for rooting froyo ace as well.

Download Files

  1. Root.zip
  2. Unroot.zip

SOURCE:xda

Saturday, January 5, 2013

How To Root Sony Xperia Tipo (Single, Dual)


Step 1: Download The Needed Files: here

Step 2: Extract The Files With Any Unrar/Zip Software.

Step 3: There You Will Find:RunMe.bat
     stuff (folder)
     RunMe.sh (Which Is Only For Linux Users)

Step 4: Connect Your Tipo To Your PC Through USB

Step 5: Turn On USB Debugging: Settings/Developer Options/ And There You Will Find A Little Box, That Says 
USB debugging. Check It

Step 6: Run The RunMe.bat file
It Will Pop Out CMD

Step 7: Make A Choice Type: 1
Press Enter

Step 8: Wait Till It Does Everything.

Step 9: Enjoy!

SORCE:xda

Saturday, October 27, 2012

How to Root Samsung Galaxy Y ?


How to Root Samsung Galaxy (GT-S5360) Step by Step Tutorial

Step 1. Download the zip files to your SD Card (not in any folder).

Step 2. Switch off your phone.

Step 3. Boot into recovery mode(Press Vol Up + Power Key + Home button together at the same time to boot in recovery mode).

Step 4. Touch screen is disabled in recovery. Use Volume keys(UP/DOWN) for scrolling and home button to select the highlighted option.

Step 5. Select Apply update for sdcard

Step 6. Select update.zip (which you have downloaded).

Step 7. Wait for it to show complete and then select reboot system.

Step 8. Your device will be successfully rooted.

Step 9. After booting, go to play store and update superuser app

Step 10. Thats it, your device is now rooted with the latest binaries
Download Link:

http://www.mediafire.com/?p0pj30e4tfad6u7